Configuring Intellij IDEA
Import your project
- Simply open your project normally
- Maven should be detected, and your project will build automatically
Exclude directories
- Right-click on the
src/main/webapp/bower_componentsfolder - Select “Mark Directory As” and select “Excluded”
- You should also exclude
.tmp/,node_modules/andsrc/main/webapp/dist(thedistfolder will be created when you generate a production build)

Java Code Support
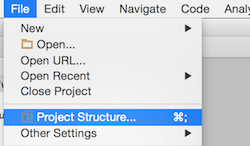
To add code support to many of the JHipster modules from a new project first go to File → Project Structure.
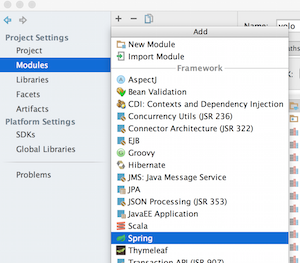
Then go to the Modules tab, click on the + button, and then click on “Spring” to add Spring code assistance to your project.
It will tell you there are unmapped Spring configuration files, click on the + sign on the bottom right (not the original one) and select all the Spring files that belong to your project, just clicking the folder is enough to select everything.
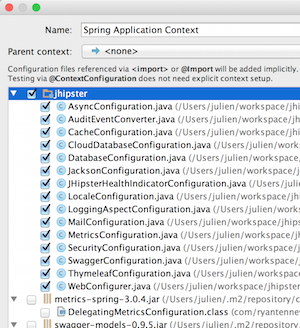
After that click OK, and Spring should be configured with proper code assistance.
Now click on the original + button which you used to add Spring in the first place, and add Hibernate. You do not need to add any files on this one, just adding it there will give you Hibernate based code assistance. Remember to click OK on the Project structure dialog.
You should now have Java support for most of the codebase. You have to repeat this step every time you start a new project, as these settings are project-specific.
Javascript Code Support
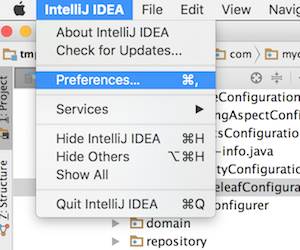
Go and open IntelliJ IDEA → Preferences....
Navigate to Languages & Frameworks → Javascript → Bower (or type “Bower” on the top search bar)
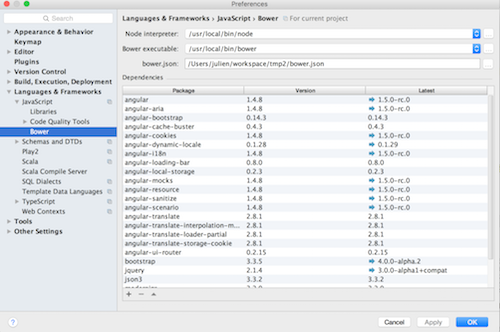
Point to your bower.json, which is located at the root of your project. The project’s libraries, like Angular.js, should be automatically recognized.
After configuring this you should have fairly extensive code support for the Javascript libraries in JHipster.
Application “hot restart” with Spring Boot devtools
Spring Boot devtools is configured by JHipster, and will “hot restart” your application when classes from your project are compiled. This is a must-have feature, as it makes your application updated on the fly.
Contrary to other IDEs such as Eclipse, IntelliJ IDEA does not automatically compile files after saving. While you could enable “Make project automatically” in the complier options, it does not work when your application is already running from the IDE.
The best way to restart the application after you modify a class is to compile it with Ctrl + Shift + F9 or to build the whole project with Shift + F9. Alternatively, you can build with a single class from the class file contextual menu by clicking on Compile className.java or build the whole project through the Build → Make project menu at the top.